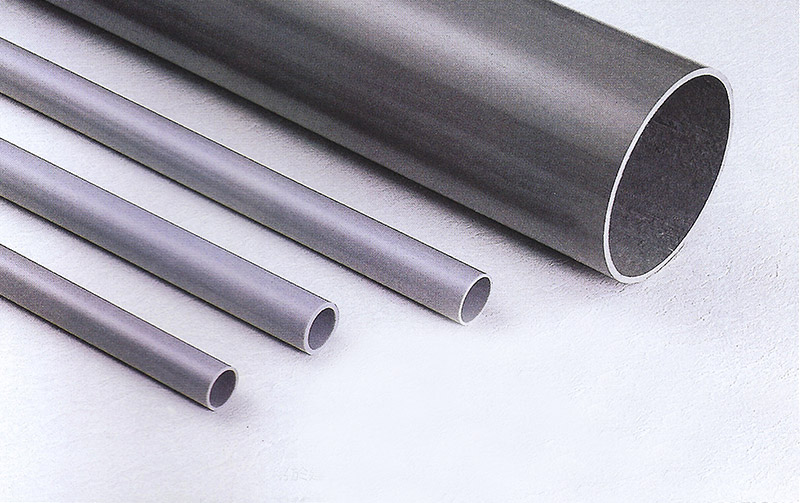
VU(A) Outer diameter, thickness and tolerance difference
unit:mm
Pipe
diameter |
Outside |
Thickness |
Reference |
| Flanges |
Outside diameter(a) |
Least |
Tolerances |
Inner diameter |
| 40 |
48.0 |
±0.2 |
1.8 |
+0.4 |
44 |
| 50 |
60.0 |
±0.2 |
1.8 |
+0.4 |
56 |
| 65 |
76.0 |
±0.3 |
2.2 |
+0.6 |
71 |
| 80 |
89.0 |
±0.3 |
2.7 |
+0.6 |
83 |
| 90 |
100.0 |
±0.4 |
3.1 |
+0.6 |
94 |
| 100 |
114.0 |
±0.4 |
3.1 |
+0.8 |
107 |
| 125 |
140.0 |
±0.5 |
4.1 |
+0.8 |
131 |
| 150 |
165.0 |
±0.5 |
5.1 |
+0.8 |
154 |
| 200 |
216.0 |
±0.7 |
6.5 |
+1.0 |
202 |
- NOTE:
- (a)The average tolerance of outer diameter refers to the value obtained by dividing the measured value of the circumference on any cross-section by the circumference ratio (3.142), or the deviation between the average measured value of the outer diameter at two equal intervals on the circumference (average outer diameter) and the basic dimension.
- (b)The mass per unit length in the table is set at the midoint of the tolerance based on the size of the tube, and calculated with the density of VP as 1.43g/cm3.
|
VP(B) Outer diameter, thickness and tolerance difference
unit:mm
Pipe
diameter |
Outside |
Thickness |
Reference |
| Flanges |
Maximum, minimum outer diameter Tolerances(a) |
Outside diameter(b) |
Least |
Tolerances |
Inner diameter |
| 13 |
18.0 |
±0.2 |
±0.2 |
2.2 |
+0.6 |
13 |
| 16 |
22.0 |
±0.2 |
±0.2 |
2.7 |
+0.6 |
16 |
| 20 |
26.0 |
±0.2 |
±0.2 |
2.7 |
+0.6 |
20 |
| 25 |
32.0 |
±0.2 |
±0.2 |
3.1 |
+0.8 |
25 |
| 30 |
38.0 |
±0.3 |
±0.2 |
3.1 |
+0.8 |
31 |
| 40 |
48.0 |
±0.3 |
±0.2 |
3.6 |
+0.8 |
40 |
| 50 |
60.0 |
±0.4 |
±0.2 |
4.1 |
+0.8 |
51 |
| 65 |
76.0 |
±0.5 |
±0.3 |
4.1 |
+0.8 |
67 |
| 80 |
89.0 |
±0.5 |
±0.3 |
5.5 |
+0.8 |
77 |
| 100 |
114.0 |
±0.6 |
±0.4 |
6.6 |
+1.0 |
100 |
| 125 |
140.0 |
±0.8 |
±0.5 |
7.0 |
+1.0 |
125 |
| 150 |
165.0 |
±1.0 |
±0.5 |
8.9 |
+1.4 |
146 |
| 200 |
216.0 |
±1.3 |
±0.7 |
10.3 |
+1.4 |
194 |
- NOTE:
- (a)The tolerance between the maximum and minimum outer diameters refers to the deviation between the maximum and minimum (maximum and minimum outer diameters) measured value on any cross-section of the outer diameter and the basic dimension.
- (b)The average tolerance of outer diameter refers to the value obtained by dividing the measured value of the circumference on any cross-section by the circumference ratio (3.142), or the deviation between the average value of the outer diameter measured at two equal intervals on the circumference (average outer diameter) and the basic dimension.
- (c)The mass per unit length in the table is set at the midoint of the tolerance based on the size of the tube, and calculated with the density of VP as 1.43g/cm3.
|
E Pipe size and its allowable difference
unit:mm
Pipe
diameter |
Outside diameter(a) |
Thickness |
Inner diameter |
Length |
| Least |
Tolerances |
| 13 |
18±0.2 |
1.8 |
+0.4 |
14 |
Marked value
+30
-10 |
| 16 |
22±0.2 |
1.8 |
+0.4 |
18 |
| 20 |
26±0.2 |
1.8 |
+0.4 |
22 |
| 28 |
34±0.3 |
2.7 |
+0.6 |
28 |
| 35 |
42±0.3 |
3.1 |
+0.8 |
35 |
| 41 |
48±0.4 |
3.1 |
+0.8 |
41 |
| 52 |
60±0.5 |
3.6 |
+0.8 |
52 |
| 65 |
76±0.5 |
4.1 |
+0.8 |
67 |
| 80 |
89±0.5 |
5.1 |
+0.8 |
78 |
| 100 |
114±0.6 |
6.6 |
+1.0 |
100 |
| 125 |
140±0.8 |
7.0 |
+1.0 |
125 |
| 150 |
165±1.0 |
8.5 |
+1.4 |
148 |
| 200 |
216±1.3 |
10.5 |
+1.4 |
194 |
- NOTE:
- (a)The outer diameter refers to the arithmetic average of the outer diameters in any two vertical directions.
- (b)The calculation of mass is based on the minimum thickness plus half tolerance of thickness as the calculation of thickness with the density. 1.43g/cm3.
|
ES-1 Pipe size and its allowable difference
unit:mm
Pipe
diameter |
Outside diameter(a) |
Thickness |
Inner diameter |
Length |
| Least |
Tolerances |
| 80 |
89±0.5 |
2.7 |
+0.6 |
83 |
Marked value
+30
-10 |
| 100 |
114±0.6 |
3.6 |
+0.8 |
106 |
| 125 |
140±0.8 |
4.1 |
+0.8 |
131 |
| 150 |
165±1.0 |
5.1 |
+0.8 |
154 |
- NOTE:
- (a)The outer diameter refers to the arithmetic average of the outer diameters in any two vertical directions.
- (b)The calculation of mass is based on the minimum thickness plus half tolerance of thickness as the calculation of thickness with the density. 1.43g/cm3.
|
